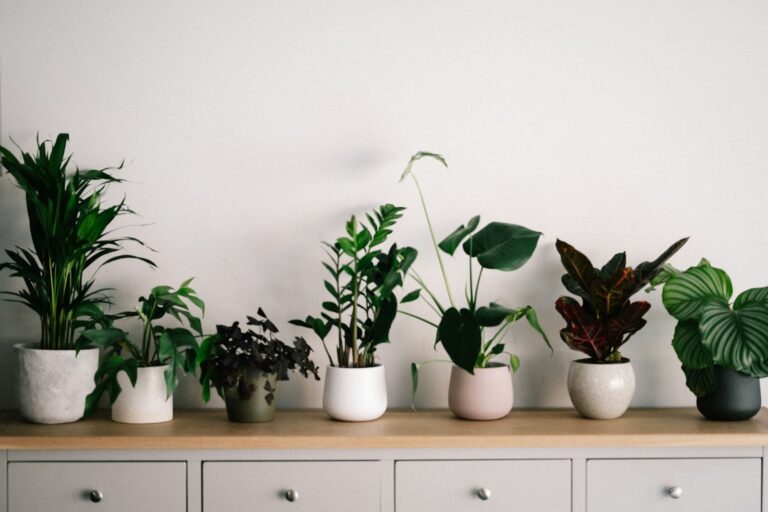
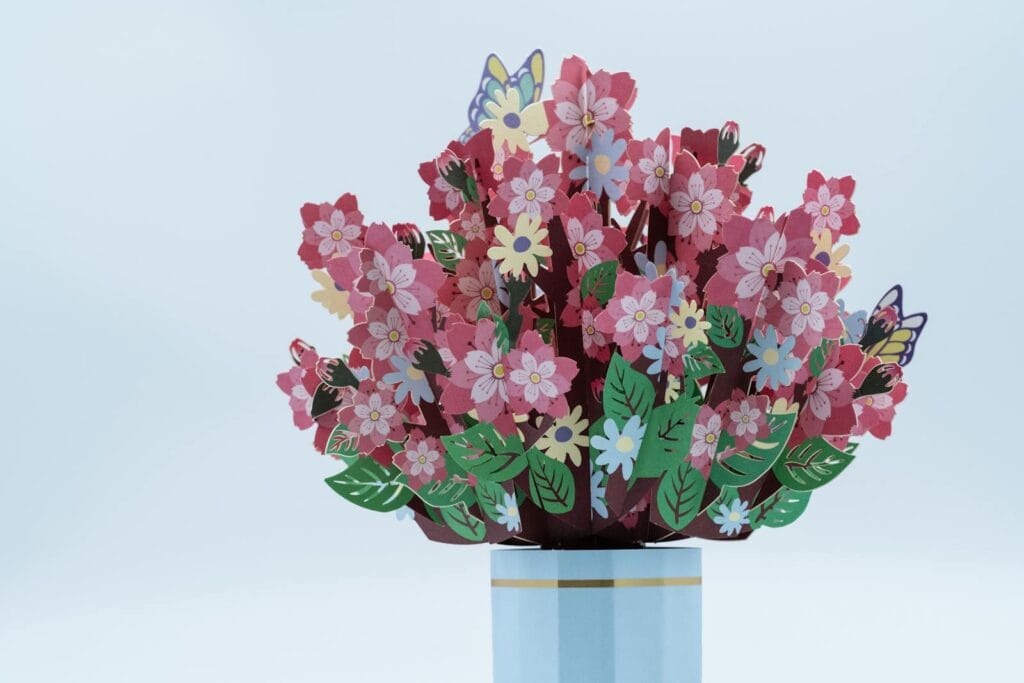
Want to brighten up your space with a crafty touch? Try making a DIY scrap paper tree centerpiece. It’s a simple way to use up leftover paper and create something pretty for your table. All you really need are styrofoam cones, some craft paint, scrapbook paper, and a glue gun.
Turning scrap paper into a tree centerpiece is a fun way to recycle and add a pop of color to your decor. You can play around with colors and patterns to fit your style or the season. Some folks swap out the styrofoam base for sticks, or toss in glass bowl fillers for a bit of sparkle.
This project is perfect for spring, but honestly, you can tweak it for any time of year. Make your tree big or small—whatever suits your space. The end result brings color and texture to your table.
Key Takeaways
- You only need basic stuff like styrofoam cones, scrapbook paper, and glue—things you probably already have.
- It’s easy to switch up the size, colors, and decorations to fit different seasons or match your vibe.
- These centerpieces are a great way to turn scrap paper into something eye-catching for your table.
Essential Materials and Tools for a DIY Scrap Paper Tree Centerpiece
You won’t need anything fancy for this project. Most supplies are probably lurking in your craft drawer already, and picking the right ones makes everything go smoother.
Choosing the Right Scrap Paper
Start with a mix of scrap paper. Scrapbook paper is great because it comes in tons of colors and patterns. Greens are classic for a tree, but don’t be afraid to grab bold or festive shades.
A medium-weight paper (think 65-80 lb) keeps its shape better than flimsy printer paper. You’ll find all sorts of good options at craft stores or online.
Try using:
- Patterned scrapbook paper
- Solid cardstock
- Bits of recycled gift wrap
- Pages from old books for a vintage feel
- Magazine pages for something colorful
Don’t stress about perfect cuts—little rips or rough edges just add character.
Gathering Crafting Supplies
Besides paper, you’ll want a base and something to cut with. Styrofoam cones work well and come in different sizes.
You’ll need:
- Scissors (sharp ones are a must)
- Craft knife (for tricky bits)
- Ruler or measuring tape
- Pencil
- Small paintbrush for glue
- A base (maybe a small pot or a cute container)
If you’re feeling extra, grab some mini ornaments, ribbon, or glass bowl fillers for a bit of flair.
Clear off a spot to work and lay out your supplies. This project is easier (and less messy) if you have room to spread out.
Selecting Adhesives for Paper Crafts
The right glue makes a difference. For paper crafts, there are a few solid choices.
Good adhesives:
- Tacky glue—dries clear, holds strong
- Hot glue gun—fast and reliable
- Glue sticks—great for kids, less mess
- Mod Podge—works as glue and sealer
Hot glue is usually best for sticking paper to styrofoam. If you’re using a glue gun, go for low-temp to avoid burns or warped paper.
Don’t overdo it with glue. Too much can make the paper wrinkle or soggy. A little goes a long way.
Step-by-Step Tutorial for Creating a Scrap Paper Tree Centerpiece
Let’s dive in. With some scrapbook paper, scissors, a craft knife, and a hot glue gun, you’ll have a centerpiece in no time.
Preparing and Cutting Paper Shapes
Gather your supplies:
- Several sheets of scrapbook paper (mix up the patterns)
- Scissors or craft knife
- Hot glue gun and glue sticks
- Thin wire for support
- Cardboard for the base
Pick papers that fit your color scheme. Cut out leaf shapes in different sizes—bigger ones for the bottom, smaller for the top.
Making 3-4 different sizes helps your tree look balanced. Make a simple template for each size and trace it to get a bunch of matching shapes.
Aim for 20-30 large leaves, 30-40 medium, and 15-20 small ones, but honestly, just cut until it looks right to you.
Assembling the Tree Structure
Roll a piece of cardboard into a cone for your base.
Glue the biggest leaves around the bottom edge, overlapping them a bit. Keep the points facing out.
Work your way up in layers, overlapping and staggering the leaves so they’re not stacked right on top of each other.
Switch to medium leaves as you go up, and finish with the smallest at the top. That way, your tree tapers naturally.
Leave a few gaps so the tree doesn’t look too packed. Light peeking through adds a nice touch.
Securing Layers and Adding Support
After each layer, run a thin line of hot glue around the tree to hold everything in place.
If you’re making a tall tree, stick some thin wire inside for extra support. You can sandwich a piece of wire between two matching leaves and glue them together for sturdy “branches.”
For the top, fold a small piece of paper into a point or star and glue it on.
Give your tree a quick once-over to check for loose pieces and add glue where it’s needed. Now it’s ready for the table—or group it with candles for a cozy display.
Creative Decoration and Embellishment Ideas
You can really make your scrap paper tree pop with a few creative touches. Here are some ways to give it personality.
Incorporating Ornaments and Miniatures
Tiny ornaments add a lot of charm. Look for little glass balls, wooden figures, or mini presents that match your colors. Attach them with hot glue or thread thin wire through the paper.
Keep the scale in mind—stuff around 1/2 to 1 inch works best. Some fun ideas:
- Tiny bells for a soft jingle
- Mini candy canes
- Small wooden stars or snowflakes
- Little pinecones from outside
Heavier ornaments should go near the bottom for balance. Lighter ones can hang from the paper branches for a festive look.
Adding Glitter and Special Finishes
Glitter is an easy way to add sparkle. Brush clear glue on the edges and sprinkle fine glitter for a frosty effect.
Try these, too:
- Metallic paint brushed on the tips
- Sparkle spray for a subtle shimmer
- Dimensional paint dots as “ornaments”
- Pearlescent ink stamped in patterns
For a snowy vibe, dab white paint on with a dry brush. Or add a little glue and iridescent glitter for a winter wonderland feel.
Personalizing with Sheet Music and Paper Stars
Old sheet music brings a nostalgic touch. Cut it into tree shapes or tear it into strips for texture. Christmas carol sheets are especially nice for the holidays.
Paper stars make great toppers or decorations. You can:
- Cut five-pointed stars from metallic paper
- Fold paper strips accordion-style and bind in the middle
- Use origami for 3D stars
Write names on stars for personalized ornaments, or cut out favorite quotes or recipes. It’s a sweet way to make your centerpiece meaningful.
Using Embellishments for a Festive Look
Embellishments are what make your tree special. Ribbon is always a winner—wrap it around like a garland or tie tiny bows.
Other ideas:
- Thread buttons as a garland
- Cut shapes from washi tape
- Glue on sequins or beads
- Tuck in paper flowers between the leaves
Small pom-poms are cute as “berries,” and you can add holly or berry stems cut from red paper for a seasonal touch. These little extras bring your tree to life and make it perfect for any gathering.
Tips for Styling and Displaying Your Paper Tree
Your paper tree centerpiece can really stand out with a little thoughtful styling. Here’s how to show it off.
Choosing the Perfect Location
Put your tree somewhere it’ll get noticed but won’t be in the way. Dining tables are great for gatherings, but coffee tables and mantels work too.
Think about the height—taller trees look better on lower surfaces, while small ones fit nicely on shelves or side tables. Make sure it’s stable so it doesn’t tip over.
Light helps! Place your tree where it catches sunlight, or add some battery-operated lights nearby to make the colors pop at night.
Pairing with Other DIY Decor
Your tree looks even better surrounded by other decorations. Try candles in clear holders for a cozy glow.
Scatter pinecones, acorns, or small ornaments around the base for extra texture.
For Christmas, group your tree with miniature village houses or other handmade crafts like paper snowflakes or origami stars. Mixing handmade items gives your display a warm, personal feel.
Stick with colors that echo your tree’s leaves for a coordinated look.
Inspiration for Seasonal Centerpieces
Change up your tree for every season. For spring, use pastel papers and add paper flowers.
Summer? Go bold with bright colors and maybe add tiny butterflies or seashells.
In fall, use oranges, reds, and browns. Add mini pumpkins or gourds at the base.
For Christmas, go classic with red and green paper, tiny bows, and a dusting of glitter. Place little gift boxes around the base for extra cheer.
Swap out ribbons or base decorations throughout the year to keep your centerpiece feeling fresh.
Frequently Asked Questions
Got questions? Here are some quick answers about making your own scrap paper tree centerpiece.
What materials are needed to create a scrap paper tree centerpiece?
You’ll need scrapbook paper in your favorite colors, scissors, a hot glue gun with glue sticks, branches or a cone-shaped base, and a vase or container.
For a spring or Easter tree, go for pastel papers. For Christmas, green card stock works great with some patterned accents.
If you’re using real branches, some acrylic paint can be nice, and a pencil helps for tracing shapes.
Can you provide a step-by-step guide for constructing a paper tree centerpiece?
Gather your materials and decide on your style. If you’re using branches, pop them in a vase. For a cone base, roll up some cardboard.
Cut out leaf shapes from your scrapbook paper. Mixing shades of the same color looks natural.
Attach the leaves to your base with a low-temp hot glue gun, starting at the bottom and working up, overlapping as you go.
Keep adding leaves until your tree looks full. Make sure the base is covered for a neat finish.
How can I ensure my paper tree centerpiece is stable and stands upright?
For branch-based trees, use a heavy vase. Drop in rocks, sand, or marbles to keep things steady.
If you’re making a cone tree, use thick cardboard for the base and make sure the bottom is flat and wide enough.
Spread the paper leaves evenly so one side doesn’t get too heavy.
What are some creative ways to decorate or embellish a paper tree centerpiece?
Add little ornaments, beads, or buttons for extra flair—these are especially fun for holiday trees.
Use patterned or glittery scrapbook papers for interest. Mixing solids and patterns gives your tree depth.
Wrap ribbon, twine, or string around the tree or hang them from the branches. Tiny LED lights can make your tree glow at night.
You can also cut out hearts, stars, or seasonal shapes to match any holiday.
Is it possible to make a scrap paper tree centerpiece using recycled materials?
Absolutely! You can use old greeting cards, magazines, gift wrap, or even bits of packaging for your tree. These scraps usually come with fun colors and patterns that add character.
Cardboard tubes from paper towels or wrapping paper work great as cone bases—just cut and shape them however you like. If you’ve got some newspaper lying around, you can paint it and use it for leaves.
Honestly, natural branches you find outside make a pretty cool tree structure. Just make sure to clean and dry them well before you start.
How long does it typically take to make a DIY paper tree centerpiece?
Usually, making a basic scrap paper tree centerpiece takes around 2-3 hours. That covers the time you’ll spend cutting out paper shapes and gluing them onto your base.
Of course, it really depends on how big you want your tree and how much detail you’re after. If you’re going for a larger tree with lots of tiny pieces, expect it to take a bit longer.
Honestly, there’s no rush—you can always break up the project over a couple of days. Maybe prep your base one day, cut out your paper shapes the next, and then put it all together when you’re ready.